Step 1: How to add an email account
1. On the device go to Settings or Configuration
- Then click Passwords and Accounts
2. Click Add Account
3. Select the Other option
4. Click Add Email Account
5. Add the email account and configure it as follows:
- Name: enter your full name
- Email Address: the email account that will be added
- Password: enter the password linked to the email
- To proceed, click Next
After adding the email account, you can now proceed to step 2 and configure the email account
Step 2: How to set up in POP or IMAP
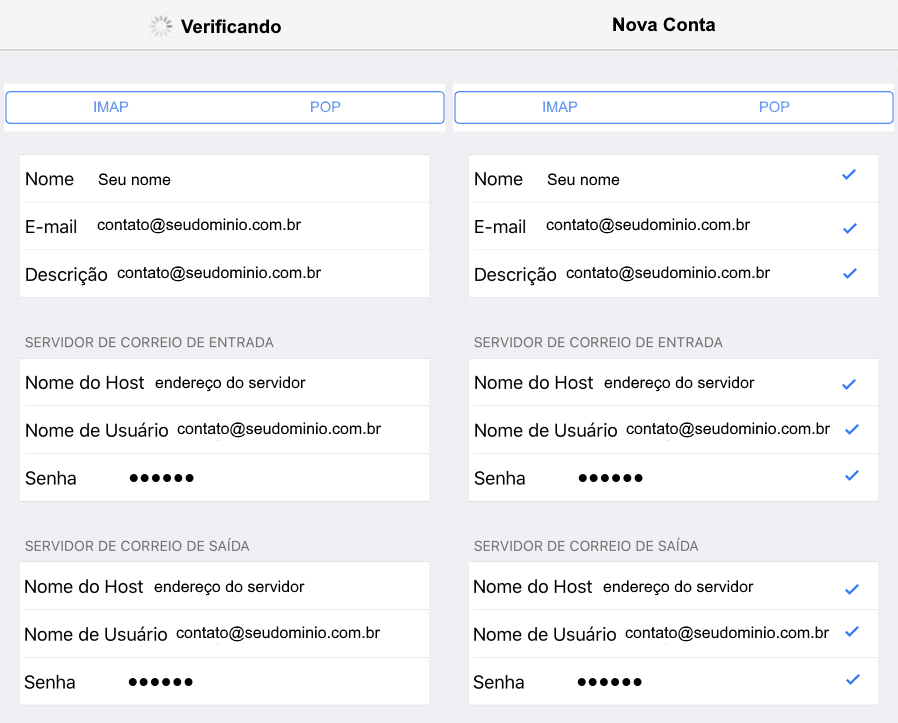
1. Then add the following data:
- Account Type: choose between using POP (allows you to download copies of the email messages to a local computer) or IMAP(allows you to read the emails as they appear on the hosting server)
- Name: type your name
- E-mail: the email account you added
- Description: retype the email account
- Host Name: Input your hosting address “mail. + the domain name (Ex: mail.seudominio.com.br)”
- Username: the email account you added
- Password: enter the password linked to the email
- Then click Next
Learn which protocol is the most recommended for your profile in the material on the differences of POP and IMAP
2. In the Incoming Mail Server and Outgoing Mail Server sections enter:
3. The account will be verified

After the check, click Save
Upon completion, the email should be set up. Run sending and receiving tests 🙂
